
Simply BIM: How to plan skylights today
Many planners, architects or fabricators already reach for their laptop rather than pen and paper: They plan with BIM. Building Information Modelling is the new buzzword. But the trend is no longer so new. However, it is now gaining more and more momentum. Why is that?
When a building is planned in BIM, this means that all the trades and companies involved in the construction virtually create the identical building and store all the relevant building and product information in it. And that is the great advantage of BIM: Everyone involved in the construction has access to all current information about the building project and the products used – provided that everyone cooperates reliably. Even last-minute changes, new dimensions and modified components are entered into the plans of all planners and fabricators in real time with all the necessary data.
Skylights can also be planned in BIM. The manufacturer LAMILUX already set out on the digital path a few years ago and made its skylights BIM-ready. Today, the family-owned company provides its customers with a BIM and product configurator, where planning in BIM software is possible on the one hand, but also conventional product configuration. We will show you how this works, step by step, in this article. Simply BIM: This is how skylights are planned today.
The BIM and product configurator from LAMILUX Skylights
You now already know that LAMILUX has a BIM and product configurator. But how do you access them? The easiest way is to know the direct link to the configurator or the shortlink to the LAMILUX BIM page. Alternatively, a search engine such as Google will lead you to the right website with search terms such as “LAMILUX+BIM+Configurator”.
On its BIM pages, LAMILUX first provides general information about the advantages of digital planning and the functions of its in-house BIM and product configurator. One of the biggest advantages of planning with BIM is that trades are not only all on the same level, but that they are also directly networked with each other. If a trade now changes something in its product, the neighbouring trades are informed and can adapt their own work directly to it. In a striking example, this would be the lighting designer, for example, who now places three more flat roof windows in the canteen roof in the central 3D building model. This change is reported to neighbouring trades such as roofers and building services planners, who can then plan materials and use them more effectively and carry out new calculations – without having to wait for an on-site construction meeting, where the topic may end up being lost in the flood of information. The automated notifications within the system support information sharing for all and can be supplemented by manual ones.
Before we show you how to create skylights for your planning software with the LAMILUX BIM and product configurator, we will summarise its most important functions: You can create your desired product, be it a rooflight dome, a flat roof window or a flat roof access hatch, in all available product variants, made-to-order for your project. The configurator guides you through the query step by step and unavailable combinations are automatically excluded. At the end of the configuration, numerous downloads are available: a PDF data sheet with all technical information, active 3D view and dimensional drawing or 2D and 3D CAD and BIM files in all common formats. A return link to the configuration is also very useful, allowing you to make changes to your desired variant at any time or to fetch further downloads from it. This link can be copied directly from the configurator, but can also always be found in the PDF data sheet. Plug-ins for the LAMILUX BIM and product configurator are also available for the popular planning software Revit, Archicad or Allplan. This means that you can integrate the configurator into your architecture programme and then plan and use LAMILUX skylights directly from there. And then it's only 7 steps to your BIM skylight.
BIM model of a LAMILUX Glass Skylight in 7 steps
Let's now start the configuration of a LAMILUX Glass Skylight in the BIM and product configurator. In fact, you can reach your goal in just 7 steps. First open the configurator and get started straight away.
Step 1: Select a product family
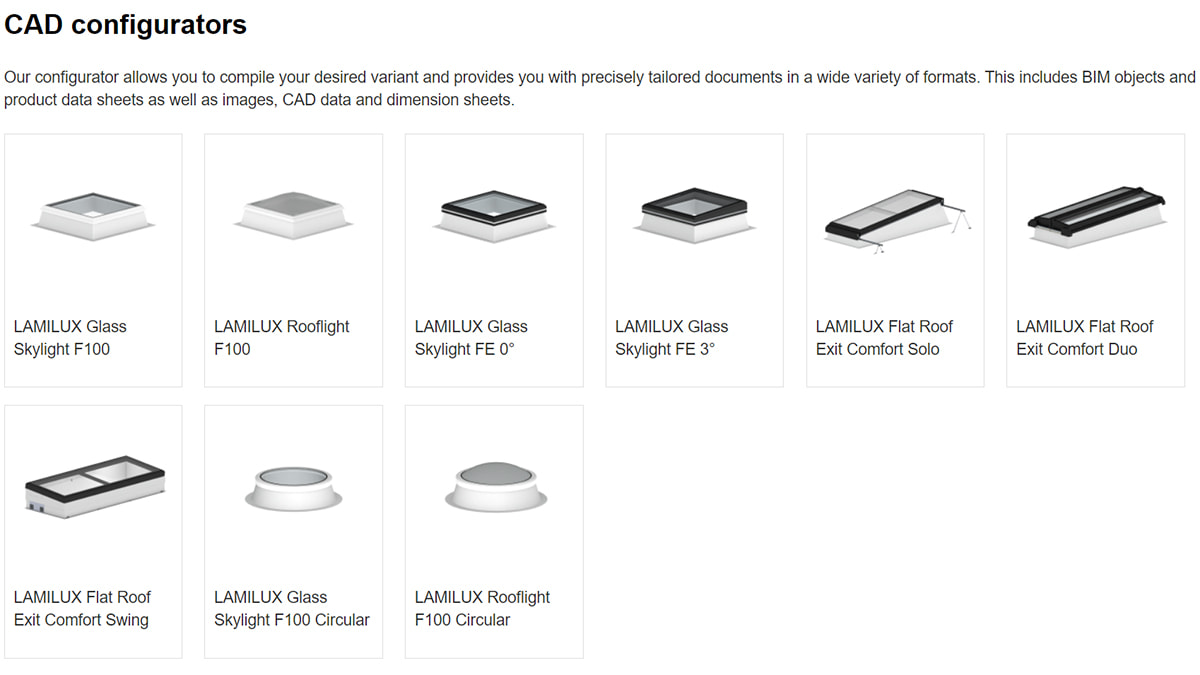
Right on the start page of the LAMILUX BIM and Product Configurator, you will see all the products that you can configure using this tool. It is titled “CAD Configurators” and includes the following products: The Glass Skylight F100 in square or circular, Glass Skylight FE 0° and Glass Skylight FE 3° as well as the Rooflight F100 in square or circular. You can also configure flat roof hatches for roof terraces, the 'LAMILUX Comfort' series: Flat Roof Exit Comfort Solo, Duo or Swing. After you have selected a product family, the configurator adapted to it loads.
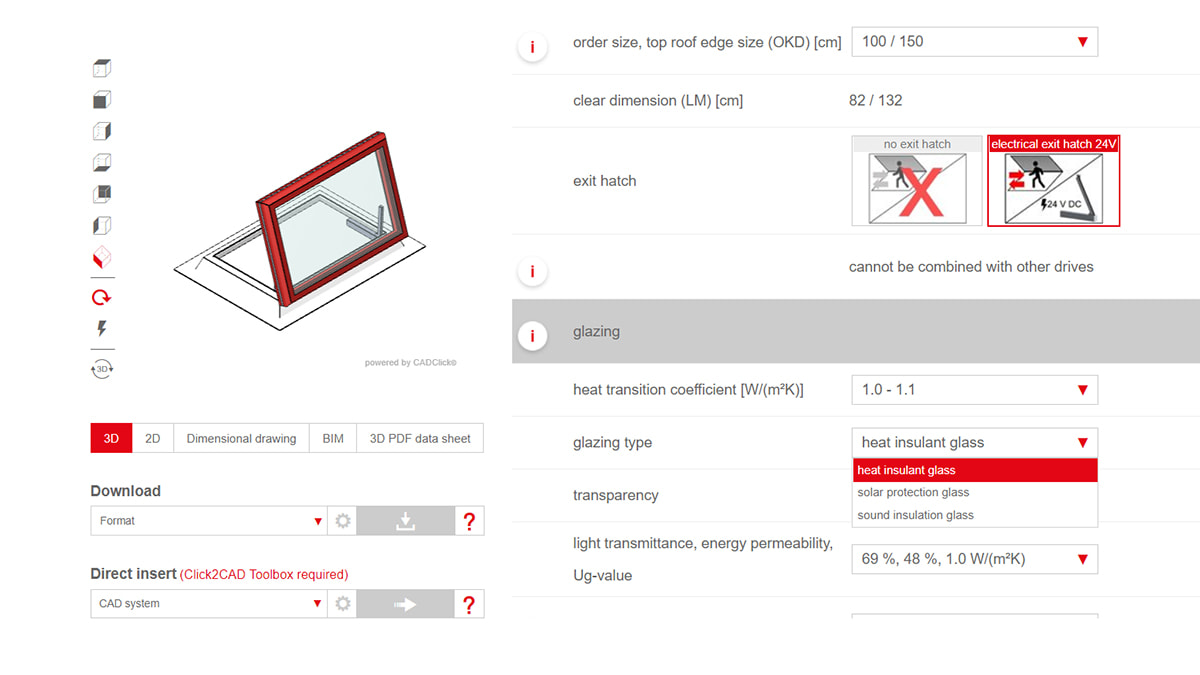
Step 2: Select the product details
A screen will now open in which you have many options to choose from: Size, type of glazing, heat transfer coefficient or opener are just a few examples of these. After each selection you make, the configurator updates itself. This is also displayed directly to you graphically as a model, so that you can also observe the changes. The selection menu adjusts itself after each configuration and shows you only the combinations that are still possible or the necessary properties. LAMILUX does not use type abbreviations and its manufacturer's language here, but only queries generally known properties.
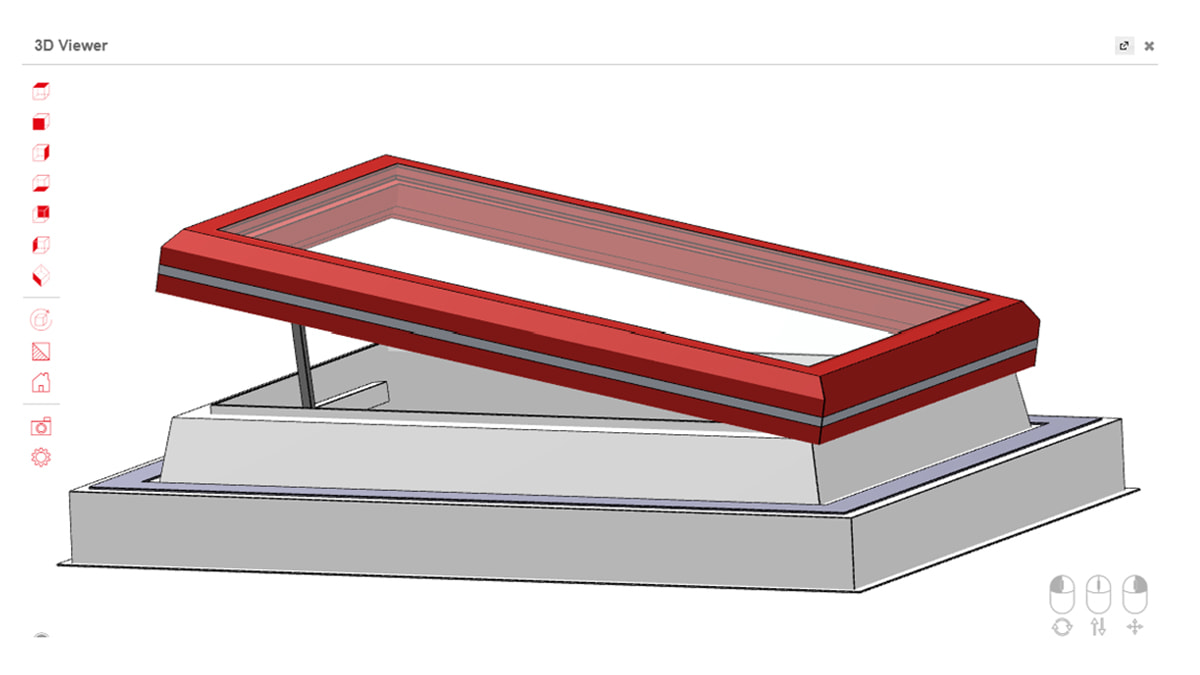
Step 3: Check your selection using the 3D preview
You can check whether you are configuring exactly the skylight you have in mind by looking at the 3D preview of the product that evolves with each selection. This is always clearly visible to you in the upper left half of the screen and can also be switched to full-screen mode. So if you are not quite sure about a selection, a quick glance at the model, which you can swivel and zoom in all directions, is sufficient.
Step 4: Let the configurator automatically check the plausibility in the background
A plausibility check runs in the background without your intervention. The BIM and product configurator calculates – in real time – whether the options you have selected are compatible with each other. This way you never run the risk of configuring a flat roof window that is unusable or incompatible in its components.
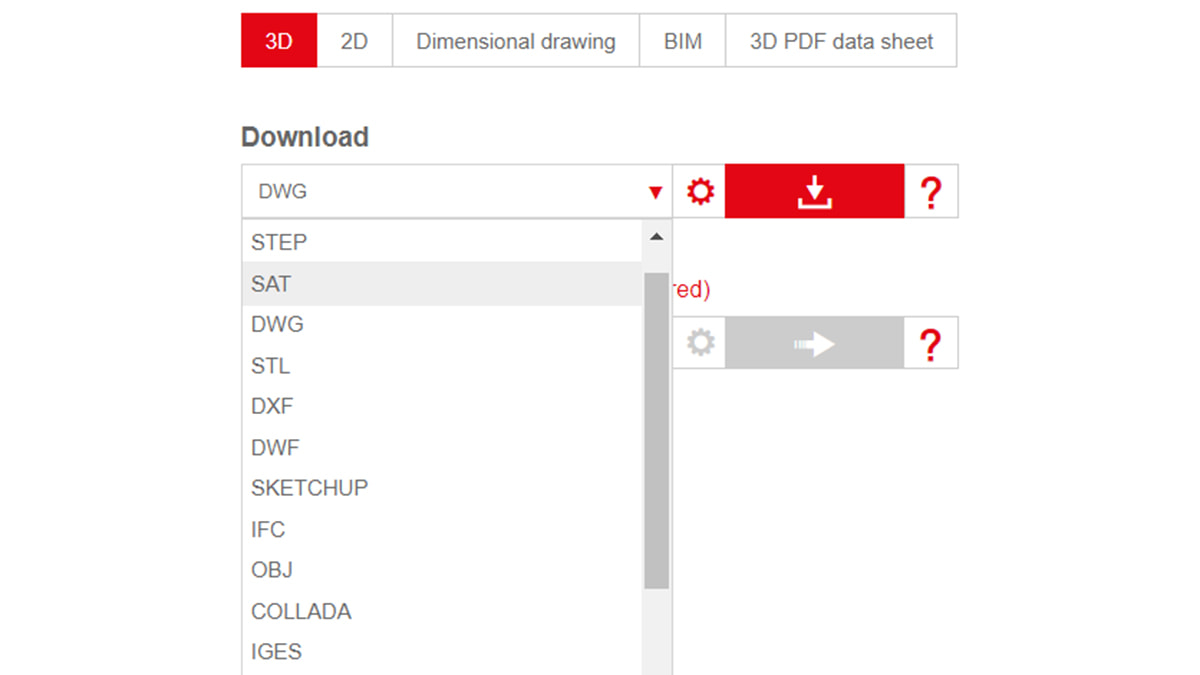
Step 5: Generate the desired downloads
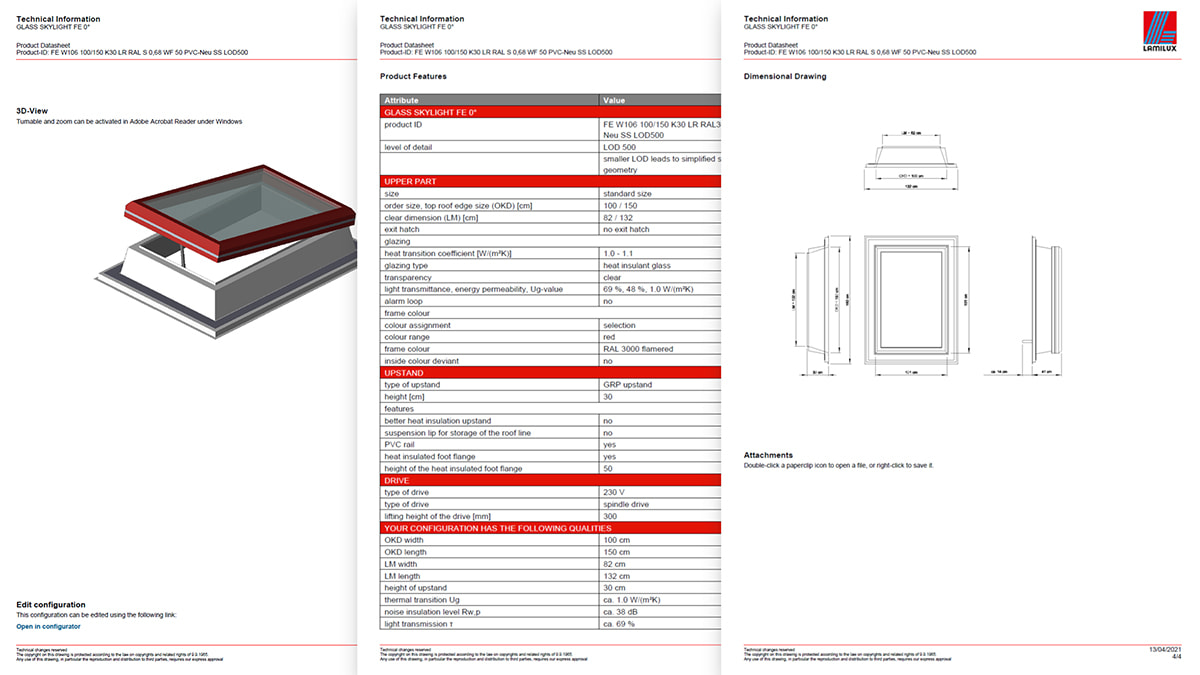
Once you have configured the Glass Skylight to your satisfaction, you can now generate the desired downloads. Here you have the option of downloading your configuration as a file, downloading it using a plug-in or sending it directly to Archicad, Revit or Allplan. The configurator generates BIM objects, 2D and 3D CAD models, images and dimensional drawings in various file formats as well as a comprehensive PDF data sheet for you.
Step 6: Access your files in the download centre
The data you generate and files you download are collected in the download centre of the BIM and product configurator. You will find this in the red bar right at the top of the website. There you can get individual downloads or all together via zip file or email. The available PDF data sheet with all technical features including active 3D model and dimensional drawing as well as a link back to the configuration is of great use. In addition, you can have another 3D CAD or BIM object and up to seven 2D views stored in your desired file format in this PDF data sheet, virtually as a file container similar to a zip. This turns the PDF data sheet into an all-in-one document for your configured Glass Skylight.

Step 7: Share the configuration with colleagues or request a quote directly from LAMILUX
You can also send the entire data sheet. With just one click, you can return from there to the corresponding configuration and continue working on it. It works even faster and easier with a link that you create directly in the configurator by clicking on the red button “Recommend product”. You copy this and send it to colleagues or customers, who can then see and edit exactly your configuration at the time of link creation or fetch their own downloads. Next to it is a second button “Request a quote”. Click on it to open a screen where you can enter your contact details and request a consultation or a quote. After sending – and really only then – your configuration and personal data will end up at LAMILUX project management, which will process your request immediately.
Why LAMILUX invests in a BIM and product configurator

Head of BIM at LAMILUX is Carsten Ficker, a qualified civil engineer. He has been in charge of this digital project for two years and developed the BIM and product configurator together with his team. They already presented a beta version of it at digitalBAU 2020 in Cologne, where LAMILUX was one of the few manufacturers of building products to be represented with its own trade fair stand alongside predominantly software companies.
Carsten Ficker sees the future of construction in digital collaboration and says: “The less we have to play telephone, the more time planners, contractors, manufacturers and the many others involved in construction have for their actual work. Digital tools should not flood communication, but make it more effective. Then there will also be more room for personal consultation, which we still rely on.”